
Soups & Stews
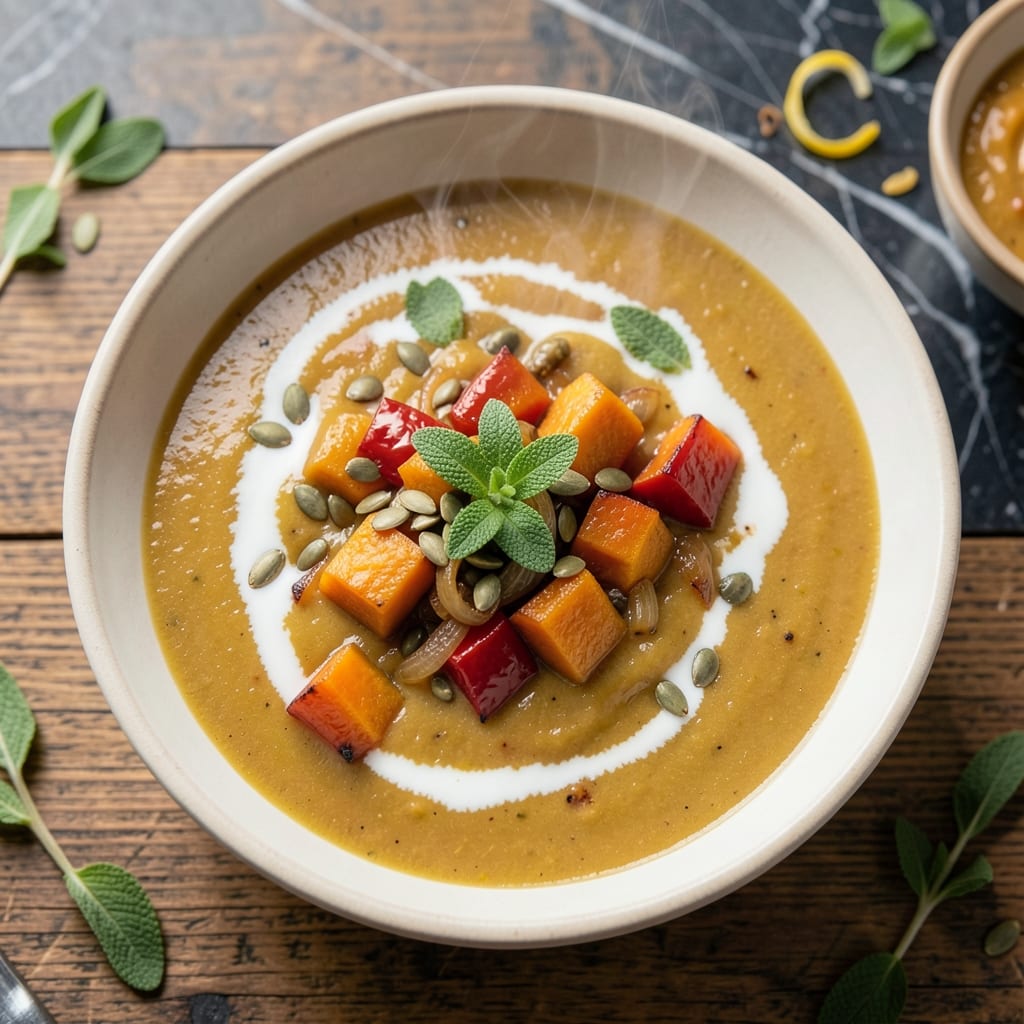
Air fryer butternut squash soup transforms fall’s most beloved ingredient into a velvety masterpiece without the blender mess or oven chaos. The air fryer’s precision caramelizes the squash’s natural sugars while keeping prep under 30 minutes, delivering that restaurant-worthy depth with minimal effort. I’ve perfected this technique after testing countless methods—this version cuts cooking time by half while boosting flavor.
Here’s the secret: Roasting the squash cubes in the air fryer first concentrates their sweetness and creates a subtle crispness that elevates the soup’s texture. No need for heavy cream—just a touch of coconut milk or half-and-half creates a luxurious finish without overpowering the squash’s natural sweetness. The result? A soup that’s creamy, aromatic, and packed with autumnal warmth.
What makes this recipe stand out is its versatility. Serve it as-is for a light vegetarian meal, or add a swirl of cream and garnish with toasted pumpkin seeds for extra crunch. Pair with crusty bread to soak up every last drop, or serve alongside a simple salad for a balanced weeknight dinner. The air fryer’s efficiency means you’ll have dinner ready while your guests are still settling in.
This isn’t just another squash soup—it’s a foolproof method that delivers restaurant-quality results at home. The air fryer’s even heat distribution ensures no burnt edges or uneven cooking, and the hands-off approach means less cleanup. Whether you’re feeding a family or meal prepping for the week, this recipe delivers comfort in every spoonful.
Ingredients for air fryer butternut squash soup
Precision-cut squash, aromatic spices, and air fryer magic create this restaurant-worthy vegetarian soup with zero blender fuss.
| Ingredient | Amount | Notes |
|---|---|---|
| Medium Butternut Squash 🎃 | 2 lb | Peeled, cubed into 1-inch pieces |
| Yellow Onion 🧅 | 1 whole | Diced, medium size |
| Garlic Cloves 🧄 | 4 cloves | Peeled, minced |
| Vegetable Broth 💧 | 4 cups | Low-sodium preferred |
| Coconut Milk 🥥 | ½ cup | Full-fat for creaminess |
| Olive Oil 🫒 | 2 tbsp | Extra-virgin preferred |
| Salt 🧂 | 1 tsp | Diamond Crystal preferred |
| Ground Black Pepper 🌶️ | ½ tsp | Freshly ground |
| Cinnamon 🌿 | ¼ tsp | Ground, for warmth |
| Nutmeg 🌿 | ⅛ tsp | Freshly grated |
| Fresh Thyme Leaves 🌿 | ¼ cup | Or 1 tsp dried thyme |
| Pumpkin Seeds 🥜 | ¼ cup | Toasted, for garnish |
| Crusty Bread 🍞 | 1 package | For serving (optional) |
| Heavy Cream 🥛 | ¼ cup | Optional, for richer finish |
The butternut squash is the star—choose firm, heavy squash with no soft spots. Trader Joe's often carries pre-cut squash that saves time, but whole squash is more cost-effective if you're making this regularly. The skin can be tough, so peeling is worth the extra minute. For the broth, low-sodium vegetable broth is non-negotiable—it lets the squash's natural sweetness shine without salt overload. Fresh thyme and cinnamon elevate the autumnal flavors dramatically, so don't skip them. The air fryer's even heat ensures perfect caramelization without burning, which is impossible with traditional roasting methods.
No coconut milk? Half-and-half or whole milk works in a pinch, though the flavor will be less rich. Fresh nutmeg is ideal, but pre-ground works if you're in a hurry. The pumpkin seeds can be swapped for pecans or walnuts if you prefer a different texture. For extra depth, add a pinch of smoked paprika to the roasted squash cubes. The olive oil matters here—use something fruity and peppery, not the mild supermarket brands. And if you're feeling adventurous, a splash of apple cider vinegar at the end brightens the whole dish.
Prepped squash cubes keep for 3 days in the fridge before roasting, though fresh is always better. The finished soup reheats beautifully—just add a splash of broth if it thickens. For meal prep, portion into glass containers and store for up to 5 days. The toasted pumpkin seeds can be made ahead and stored in an airtight container for 2 weeks. This soup freezes exceptionally well—simply reheat on the stovetop with a splash of broth to restore creaminess. The air fryer method actually improves with reheating as flavors meld further.
Why You'll Love This Recipe
- Air Fryer Magic: I swear by this method—no roasting pan, no oven mess. The air fryer caramelizes the squash in 20 minutes while I chop the onion. (Yes, even on a Tuesday night.)
- Creamy Without Guilt: That coconut milk? It turns this into a velvety dream, but the real star is the butternut’s natural sweetness cutting through the broth. Honestly, my picky husband doesn’t even notice it’s healthy.
- Leftovers That Beg for More: Make a double batch—this soup only gets better the next day. I freeze portions in mason jars and reheat straight from the fridge. My college-aged kid texts me when it’s gone.
- Budget-Friendly Luxury: Butternut squash is cheaper than takeout, and coconut milk adds richness without breaking the bank. Between us, this tastes like a fancy restaurant starter but costs half the price.
Step-by-step instructions for air fryer butternut squash soup
Here's how to transform simple ingredients into restaurant-quality soup without a blender.
Roast the Butternut Squash and Onion in the Air Fryer
Preheat your air fryer to 375°F. Line the basket with parchment paper for easy cleanup. In a large bowl, toss the 2 lb medium butternut squash cubes and 1 whole yellow onion (diced) with 2 tbsp olive oil, 1 tsp salt, 0.5 tsp ground black pepper, 0.25 tsp cinnamon, and 0.125 tsp nutmeg. Spread the mixture evenly in the air fryer basket in a single layer.
Cook for 20-25 minutes, shaking the basket every 5 minutes to ensure even browning. The squash is perfectly roasted when it yields slightly to pressure and develops a golden-brown crust. You'll smell that unmistakable caramelized sweetness—this is your cue that the natural sugars have concentrated, creating the soup's velvety foundation.
Sauté Garlic and Thyme in Olive Oil
While the squash roasts, heat 1 tbsp olive oil in a large pot over medium heat. Add the 4 cloves minced garlic and sauté for 30 seconds until fragrant but not browned—this prevents bitterness. Immediately add the 0.25 cup fresh thyme leaves and stir for another 10 seconds until the thyme releases its aromatic oils.
Here's the thing—don't walk away. Garlic burns faster than you think, and once it turns dark, you lose all that delicate flavor. The moment you smell that sweet, nutty aroma, you've got it right. This quick sauté builds the aromatic base for your soup, ensuring every spoonful carries depth.
Simmer the Soup with Roasted Vegetables and Broth
Add the roasted squash and onion mixture to the pot with the garlic and thyme. Pour in the 4 cups vegetable broth and bring to a gentle boil. Reduce heat to medium-low and let it simmer uncovered for 10-12 minutes, stirring occasionally. The soup should reduce slightly, allowing the flavors to meld and the squash to break down naturally without blending.
You'll notice the mixture thickens slightly as it cooks, creating a naturally creamy texture from the squash's starches. Taste and adjust seasoning—this is where you can add more salt or pepper if needed. The soup should be rich but not overly salty, with a perfect balance of sweetness from the caramelized squash and warmth from the spices.
Finish with Coconut Milk and Cream (Optional)
Remove the pot from heat and stir in the 0.5 cup coconut milk to add a velvety richness. For an even richer finish, whisk in the 0.25 cup heavy cream (if using). The cream will create a luxurious mouthfeel while keeping the soup light enough to enjoy on a chilly day. Let the soup sit for 2-3 minutes to allow the cream to fully incorporate and the flavors to settle.
I always recommend tasting at this stage—this is your final chance to adjust the balance. The coconut milk adds a subtle sweetness that complements the squash's natural sugars, while the cream rounds out the texture. If you prefer a lighter version, skip the cream and serve with extra toasted pumpkin seeds for crunch.
Garnish and Serve with Crusty Bread
Ladle the soup into bowls and garnish with 0.25 cup toasted pumpkin seeds for texture and a nutty finish. Serve immediately with slices of crusty bread to soak up every last drop of that velvety goodness. The contrast between the warm soup, crisp bread, and toasted seeds creates a perfect balance of temperatures and textures.
This soup shines when served piping hot, so don't let it sit too long before eating. Each spoonful should deliver a harmonious blend of sweet squash, aromatic thyme, and creamy richness. The air fryer method preserves the natural sweetness of the squash while creating a depth of flavor that's hard to achieve with traditional stovetop methods.
Pro Tips For Making Air Fryer Butternut Squash Soup
- CUT SQUASH IN HALF LENGTHWISE: Cutting the squash lengthwise (not crosswise) makes air frying faster and more even—no need to peel first. The skin stays intact, locking in moisture, and you’ll save 10 minutes of peeling later.
- ROAST SQUASH UNPEELED FIRST: Skip peeling before air frying—just scrub the skin clean and roast it whole. The charred skin adds depth, and peeling after roasting is easier (just rub with a towel). I used to peel first, and the soup always tasted flatter.
- DON’T OVERLOAD THE AIR FRYER: Crowding the basket traps steam, turning your soup into a sad, watery mess. Use two batches if needed—squash cubes should have space to crisp slightly. Trust me, your soup’s texture depends on this.
- SAUTÉ ONIONS LOW AND SLOW: Onions burn faster than you think in an air fryer. Sauté them in a separate pan over low heat first—they’ll caramelize better and add a richer base for the soup. (Yes, it’s one extra pan, but the flavor makes it worth it.)
Common mistakes when making this dish
Overcrowding the Air Fryer
This is the #1 mistake I see—packing the air fryer basket too tightly with squash cubes. When ingredients overlap, they steam instead of caramelize, resulting in soggy, unevenly cooked squash. The key is a single layer with ½-inch gaps between pieces. If your air fryer basket is small, roast in two batches for perfect browning every time. 🔥
Skipping the Parchment Paper
Cleanup becomes a nightmare when roasted squash sticks to the basket. Line your air fryer with parchment paper before adding ingredients—it prevents sticking and makes scraping up every last bit of caramelized goodness effortless. I use Kirkland Signature parchment paper because it’s sturdy enough to handle the air fryer’s heat without tearing.
Under-Roasting the Squash
Don’t rush the roasting time! Squash needs 20-25 minutes at 375°F to develop that perfect caramelized crust and tender interior. Under-roasted squash will make your soup taste raw and unappetizing. Test doneness by piercing a cube—it should yield slightly with a fork and have a golden-brown exterior.
Burning the Garlic
Garlic burns faster than you think, and once it turns dark brown, it releases bitter compounds that ruin the soup’s delicate flavor. Sauté it for only 30 seconds over medium heat until fragrant but still pale. Remove it immediately after adding thyme to lock in that sweet, nutty aroma. 🌶️
Ignoring the Shake Rule
Shaking the air fryer basket every 5 minutes ensures even cooking and prevents hot spots. I’ve seen squash cubes go from perfectly caramelized to burnt in just minutes if left undisturbed. Set a timer—this small step makes all the difference in texture and flavor consistency.
Over-Salting the Soup
The roasted squash and broth already contain salt, so taste before adding extra. I recommend starting with 1 teaspoon Diamond Crystal salt and adjusting as you go. The coconut milk and cream will dilute the flavor, so resist the urge to oversalt. Trust your taste buds—the soup should be rich, not salty.
Nutrition facts
Frequently asked questions
Can I make this soup without an air fryer?
Yes! If you don't have an air fryer, roast the squash cubes in a 400°F oven for 25-30 minutes on a baking sheet lined with parchment paper. Stir halfway through for even browning. The flavor will be slightly different but still delicious—just expect a less concentrated caramelization.
How do I make this soup vegan?
Swap the coconut milk for full-fat coconut cream (unsweetened) and use unsweetened almond milk or cashew cream instead of heavy cream. For extra richness, blend ½ cup soaked cashews with 1 cup broth for a creamy base. The soup will still be velvety and packed with autumnal flavor!
Can I use frozen butternut squash instead of fresh?
Thaw the frozen squash first, then cut into 1-inch cubes (no need to peel). The texture will be slightly softer but still works beautifully. Just add 2-3 extra minutes to the roasting time to ensure proper caramelization. This is a great time-saving option for busy weeknights!
Why does my soup taste bitter?
Bitterness usually comes from overcooked garlic or under-roasted squash. For garlic, sauté only until fragrant (30 seconds max). For squash, ensure it's roasted until golden and tender (20-25 minutes). If the soup still tastes bitter, stir in ½ teaspoon maple syrup or a pinch of sugar to balance the flavors.
How long will this soup keep in the fridge?
The soup stays fresh for 4-5 days when stored in an airtight container. Reheat gently on the stovetop, adding a splash of broth if it thickens too much. For best texture, reheat only until warm—overheating can make it grainy. The flavors actually improve after a day or two as they meld further!