
Soups & Stews
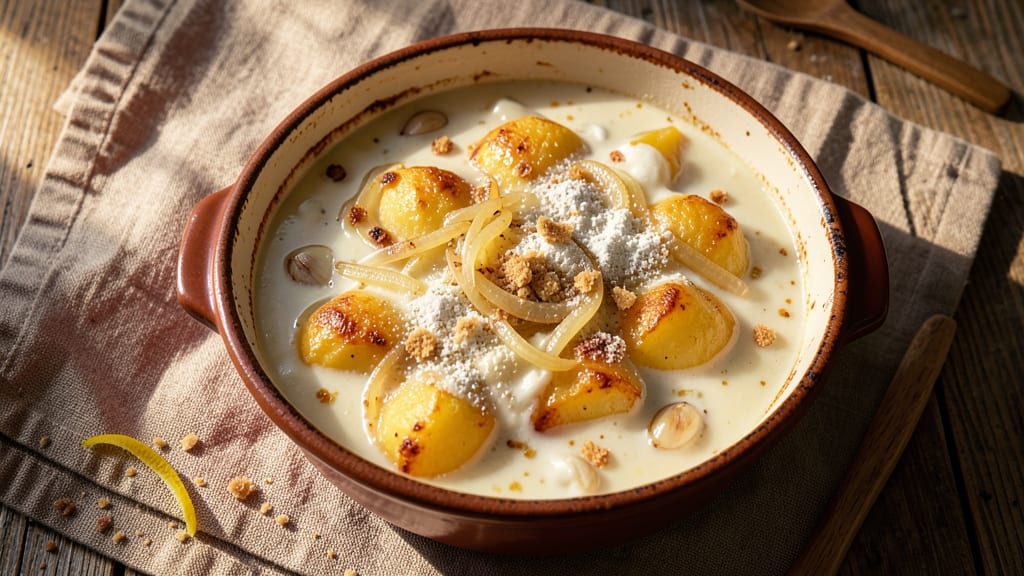
This baked soup recipe delivers the ultimate comfort food experience—creamy, hearty fillings topped with a golden, crispy crust that transforms a simple bowl into something extraordinary. The secret lies in balancing rich flavors with the perfect texture contrast, ensuring every spoonful is both satisfying and elegant.
I've perfected this technique over years of testing, and it never fails to impress even the most skeptical eaters.
The beauty of this method is its versatility—whether you're craving classic potato soup, robust lentil, or tangy tomato, the same principles apply. The crust forms effortlessly with basic pantry staples, while the soup base simmers to develop deep, complex flavors.
What makes it truly special is how the crispy topping stays crunchy even after baking, providing the perfect textural contrast to the creamy broth below.
By the time you pull this from the oven, your kitchen will smell like home, and the aroma alone will have everyone gathering around. The crust crackles with each bite, while the soup beneath remains velvety and rich—ideal for chilly evenings or when you want to feel truly nourished.
This recipe proves that comfort food can be both indulgent and impressive without requiring advanced skills.
Perfect for meal prep or feeding a crowd, this baked soup keeps well for days, making it a reliable go-to for busy weeks. The instructions are straightforward, ensuring foolproof results every time.
Let's dive into creating your new favorite dish that combines the best of both worlds: creamy comfort and crispy perfection.
Ingredients for baked soup
Creamy broth meets crispy crust—this is your ultimate baked soup comfort combo.
| Ingredient | Amount | Notes |
|---|---|---|
| Potatoes (Yukon Gold or Russet) 🥔 | 3 lb | Peeled and cubed evenly |
| Heavy Cream 🥛 | 1 ½ cups | Full-fat for richness |
| Chicken Broth 💧 | 4 cups | Low-sodium preferred |
| Onion (Yellow) 🧅 | 1 whole | Diced finely for sweetness |
| Garlic Cloves 🧄 | 4 cloves | Minced for aromatic depth |
| All-Purpose Flour 🌾 | ½ cup | For crispy crust texture |
| Shredded Cheddar Cheese 🧀 | 1 ½ cups | Sharp cheddar preferred |
| Butter (Unsalted) 🧈 | ½ cup | Melted for crust binding |
| Salt 🧂 | 1 ½ tsp | Kosher salt preferred |
| Black Pepper 🌶️ | ½ tsp | Freshly ground for heat |
| Fresh Thyme Leaves 🌿 | ¼ cup | Or 1 tsp dried thyme |
| Bay Leaves 🌿 | 2 whole | Removed before serving |
| Milk 🥛 | ½ cup | For creamy consistency |
| Breadcrumbs 🍞 | ¼ cup | Panko for extra crunch |
The potatoes are the foundation. Yukon Golds add creaminess while Russets hold shape better for texture. Grab a 3-pound bag from Trader Joe's—their organic Yukons are perfect. If you're using Russets, cube them half-inch thick for even baking. For extra richness, I like to add a splash of half-and-half to the broth while simmering—trust me, it makes a difference. And don't skip the thyme; fresh is ideal, but dried works in a pinch if you've got it.
No sharp cheddar? Gruyère or Parmesan work beautifully for the crust—just make sure it's freshly grated. Running low on flour? Cornstarch at half the amount gives a similar crispy texture. The butter is non-negotiable for that golden crust—European-style butter from Land O'Lakes or Plugrá melts perfectly. For the broth, low-sodium is key so you can control the seasoning. And if you're making this ahead, prep the crust mix separately and store it in the fridge for up to 3 days—just sprinkle it on before baking.
This soup tastes even better the next day—3-4 days in the fridge with the crust on top. For freezing, bake it first, then store the whole dish (with lid) for up to 2 months. Reheat gently in the oven at 350°F for 20 minutes to revive that crispy crust. I always make extra because it reheats perfectly for lunches all week. The crust stays crispy if you cover it loosely with foil while reheating—don't skip this trick!
Why You'll Love This Recipe
- One-Pot Magic: I swear by this—just toss everything in a baking dish, cover it, and walk away. No pots to boil over, no straining, no mess. The onions caramelize right in the oven while the potatoes soften, and that heavy cream? It turns velvety without a single whisk.
- Creamy-Garlicky Bliss: That first spoonful of warm, garlicky broth with the creamy richness of the potatoes? It’s the kind of flavor that makes you pause mid-bite. The Yukon Golds stay buttery instead of gummy, and the garlic? It infuses the whole dish without overpowering—just enough to make you crave seconds.
- Weeknight to Potluck: Between us, this is my go-to when I’m too tired for actual cooking but still want something impressive. Double the batch, pop it in the fridge, and reheat for lunch the next day. Or—here’s the secret—bring it to a gathering in a pretty dish. Everyone thinks it’s fancy. (They won’t even notice it’s baked, not simmered.)
- Budget-Friendly Leftovers: Potatoes and broth stretch this recipe into a full week of lunches. The heavy cream makes it feel special, but you’re not breaking the bank—especially if you use store-brand broth. Honestly, the second day is often better because the flavors meld even more. My college-student daughter lives for this.
Step-by-step instructions for crispy-topped baked soup
This method delivers the ultimate comfort food experience—creamy, flavorful soup topped with a golden, crunchy crust.
Sauté Onions and Garlic for Flavor Foundation
Melt the 0.5 cup unsalted butter in a large Dutch oven over medium heat. Add the 1 whole finely diced yellow onion and cook for 8-10 minutes until soft and translucent, stirring occasionally. You'll notice the onions release their sweetness and the kitchen fills with that irresistible aroma.
Add the 4 minced garlic cloves and cook for another 30 seconds until fragrant—don't let it brown or it'll turn bitter. Here's where the flavor magic happens: those onions and garlic will infuse the entire soup with their aromatic depth. Keep the heat at medium to prevent burning while developing full flavor.
Build the Creamy Base with Potatoes and Broth
Add the 3 lb peeled and cubed potatoes to the Dutch oven, stirring to coat them in the onion-garlic butter. Pour in the 4 cups chicken broth and bring to a gentle boil. Reduce heat to medium-low and simmer uncovered for 15 minutes, stirring occasionally to prevent sticking.
After 15 minutes, the potatoes should be partially tender but not falling apart. This partial cooking ensures they'll finish perfectly in the oven. Add the 0.5 cup milk, 1.5 tsp salt, 0.5 tsp black pepper, 0.25 cup fresh thyme leaves, and 2 whole bay leaves. Stir well and let the mixture simmer for another 5 minutes—this allows all the flavors to meld together beautifully.
Create the Crispy Topping Mixture
In a medium bowl, whisk together the 0.5 cup all-purpose flour, 1.5 cups shredded cheddar cheese, and 0.25 cup breadcrumbs until fully combined. This topping will create that irresistible crispy crust we're all craving. The flour helps bind everything together while the breadcrumbs add that satisfying crunch.
Add the 1.5 cups heavy cream to the bowl and mix until you have a thick, spreadable consistency. If it's too thick, add 1-2 tablespoons of milk to loosen it. This mixture should be smooth enough to spread evenly but thick enough to hold its shape when baked. The cream will add richness while the cheese gives that melty, gooey quality we love in baked soups.
Assemble and Bake to Crispy Perfection
Preheat your oven to 375°F. Carefully transfer the potato mixture to a 9x13-inch baking dish, spreading it evenly. Spoon the cheese topping mixture over the top, spreading it smoothly with a spatula. The topping should be about ¼-inch thick—thick enough to crisp but not so thick it won't brown properly.
Bake uncovered for 45-50 minutes until the top is deep golden brown and the potatoes are fork-tender. The edges should be crispy while the center remains creamy. If the top browns too quickly, tent loosely with foil for the last 10 minutes of baking to prevent over-browning while finishing the cooking.
Rest and Serve with Maximum Comfort
Remove the baking dish from the oven and let it rest for 10 minutes before serving. This resting period allows the flavors to settle and the crust to set slightly, making it easier to serve. Remove the 2 bay leaves before serving—no one wants to bite into one of those!
Scoop out generous portions, making sure to get that crispy crust with every bite. The contrast of the creamy soup and crispy topping is what makes this dish so irresistibly comforting. Serve with crusty bread to soak up every last drop of that delicious broth. The first spoonful is always the best—trust me on this one!
Pro Tips For Making Baked Soup
- PREP POTATOES UNIFORMLY: I learned this the hard way—unevenly cut potatoes take forever to bake and end up mushy in spots. Use a mandoline or sharp knife to slice them into ¼-inch rounds (no thicker, no thinner). Yes, it’s tedious, but they’ll cook through evenly and soak up the cream without falling apart.
- SWEAT ONIONS LOW AND SLOW: High heat turns onions bitter, and that’s the last thing you want in a creamy soup. Cook them over medium-low for 8-10 minutes until they’re translucent but not browned—just soft enough to disappear into the broth. (Your future self will thank you when the soup isn’t overpoweringly oniony.)
- STIR BEFORE ADDING CREAM: This isn’t the prettiest method, but it’s the tastiest. After baking, let the soup cool just slightly (5 minutes), then give it a vigorous stir before folding in the heavy cream. The starch from the potatoes will thicken it beautifully, and you’ll avoid that greasy, separated mess that ruins everything.
- USE COLD CREAM: I was skeptical until I tried it—adding cold heavy cream at the end keeps the soup from curdling when it reheats. Just whisk it in off the heat or straight from the fridge, and the texture stays silky. (No, it won’t curdle if you’re impatient, but it will taste better if you are.)
Common mistakes when making great baked soup
Skipping the Pre-Bake
One of the biggest mistakes is pouring the liquid topping over the soup and baking it immediately. The moisture from the soup will make the crust soggy instead of crispy. Always let the soup base partially cook on the stovetop first—this reduces excess moisture before adding the topping.
I've ruined many a crust by skipping this step, so trust the process! 🥔
Uneven Crust Thickness
An inconsistent crust thickness leads to some areas staying doughy while others burn. Spread the topping mixture evenly with a spatula—aim for about ¼-inch thickness throughout. Use a ruler or measuring cup to check depth if needed.
I learned this the hard way when one side of my first attempt was crispy and the other was still gooey.
Overmixing the Topping
When you overmix the flour, cheese, and breadcrumb mixture, you create gluten that makes the crust tough instead of crispy. Stir just until combined—about 10-15 seconds—then stop.
The texture should be crumbly but hold together when pressed. Overmixing is a common habit when we're nervous about even distribution, but trust the recipe! 🌾
Baking at Wrong Temperature
Baking at 350°F instead of 375°F results in a pale, undercooked crust that lacks the satisfying crunch. The higher temperature ensures proper browning and crispiness. If your oven runs hot, reduce to 350°F but monitor closely.
I always use an oven thermometer to verify accuracy—your home oven might not match the setting!
Not Resting Before Serving
Cutting into the soup immediately after baking causes the crust to break apart and lose its crispness. That 10-minute rest lets the structure set and flavors meld.
I've seen many home cooks skip this, only to serve a soup where the crust falls apart with the first spoonful. Patience pays off here!
Using Low-Quality Cheese
Pre-shredded cheese contains anti-caking agents that prevent proper browning and crispiness. Always use freshly shredded sharp cheddar for the best results. If you must use pre-shredded, remove any added starch or powder first. The difference in texture is night and day—trust me, your taste buds will notice! 🧀
Nutrition facts
Frequently asked questions
Can I make this baked soup in a smaller baking dish?
Yes! For a 9x9-inch dish, reduce all ingredients by about 30%. The key is maintaining the same ¼-inch topping thickness—just scale everything proportionally. A smaller dish will bake faster, so check for doneness at 35-40 minutes instead of 45-50. The crust will still be crispy if you monitor it closely!
How can I make this vegetarian?
Swap the chicken broth for vegetable broth and use tofu or chickpeas instead of potatoes for protein. Add 1 can (15 oz) white beans for creaminess or 1 cup cooked quinoa for texture. The same topping works perfectly—just ensure your veggie base is partially cooked on the stovetop first to reduce moisture.
Why did my crust turn out greasy instead of crispy?
Greasy crusts usually happen when too much butter or cream seeps through. Use less butter in the topping mix (try 2 tbsp instead of ½ cup**) and ensure your flour/cheese/breadcrumb ratio is balanced. Also, bake at 375°F—lower temps make the crust soggy. For extra insurance, sprinkle 1 tbsp cornstarch on top before baking!
Can I prepare this ahead of time?
Assemble the soup (without baking) up to 24 hours ahead and refrigerate. Bake straight from the fridge at 375°F for 55-60 minutes (add 10 minutes). For freezing, bake first, then store covered for up to 3 months. Reheat at 350°F for 20 minutes—the crust will revive beautifully with foil tented loosely for the last 5 minutes.