
Soups & Stews
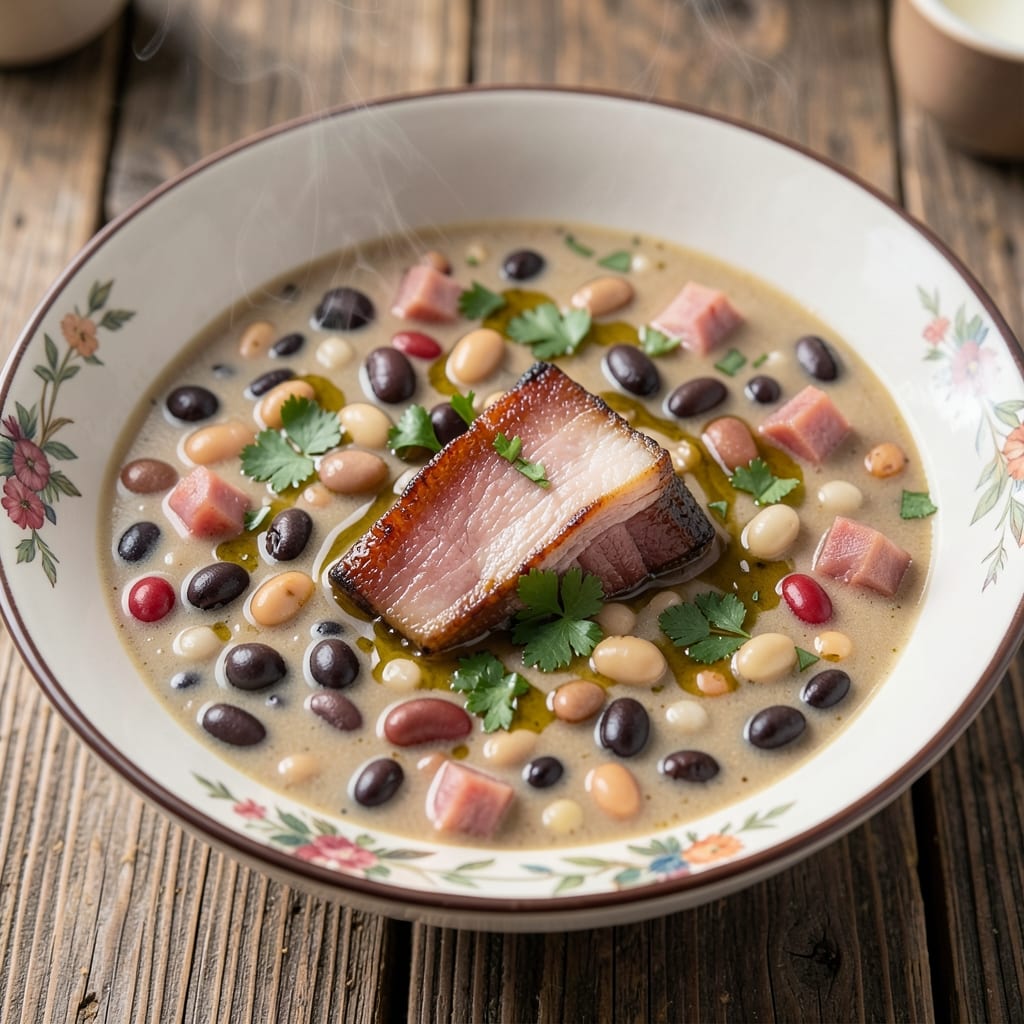
This 10 bean soup recipe with ham delivers the ultimate comfort food—warm, hearty, and packed with protein to fuel through winter’s coldest days. I’ve perfected it over years of testing, balancing tender beans, smoky ham, and aromatic spices for a stew that simmers into rich, velvety perfection. The secret? Slow cooking transforms tough beans into melt-in-your-mouth bites while letting the ham infuse every spoonful with savory depth.
What sets this recipe apart is its versatility—classic enough for a Sunday supper but adaptable for meal prep or slow-cooker convenience. You’ll start with a simple sauté of onions, garlic, and ham, then layer in a mix of beans (white, kidney, pinto, and more) that soak up the flavors as they simmer for hours. The broth reduces to a deep, caramelized richness, while herbs and spices add layers of warmth without overpowering the natural taste of the ingredients.
By the time it’s done, you’ll have a protein-packed stew that’s hearty enough to stand alone or pair with crusty bread and a green salad. The ham adds a smoky backbone, while the beans deliver fiber and plant-based protein. This isn’t just soup—it’s a one-pot meal that tastes even better the next day, making it perfect for busy weeks or cozy gatherings.
Ready in about 2 hours (or less with a slow cooker), this recipe is foolproof and designed to impress. Whether you’re feeding a family or meal prepping for the week, the result is a restaurant-quality stew that tastes like home. Let’s get cooking!
Ingredients for 10 bean soup recipe with ham
Ten kinds of beans, smoky ham, and aromatic spices—this is your ultimate winter comfort stew.
| Ingredient | Amount | Notes |
|---|---|---|
| Dried Navy Beans 🌾 | 1 cup | Rinsed before cooking |
| Dried Kidney Beans 🌾 | 1 cup | Rinsed before cooking |
| Dried Pinto Beans 🌾 | 1 cup | Rinsed before cooking |
| Dried Black Beans 🌾 | 1 cup | Rinsed before cooking |
| Dried Great Northern Beans 🌾 | 1 cup | Rinsed before cooking |
| Dried White Beans 🌾 | 1 cup | Rinsed before cooking |
| Dried Chickpeas 🌾 | ½ cup | Rinsed before cooking |
| Dried Lentils 🌾 | ½ cup | Green or brown preferred |
| Diced Ham 🥓 | 1 lb | Smoked or honey-glazed |
| Yellow Onion 🧅 | 1 whole | Diced, medium size |
| Garlic Cloves 🧄 | 4 cloves | Minced, fresh preferred |
| Carrots 🥕 | 3 whole | Peeled, chopped |
| Celery Stalks 🥬 | 3 whole | Chopped, fresh preferred |
| Bay Leaves 🌿 | 2 whole | Dried, for flavor |
| Dried Thyme 🌿 | 1 tsp | Or 1 tbsp fresh |
| Dried Oregano 🌿 | 1 tsp | Italian preferred |
| Ground Black Pepper 🌶️ | 1 tsp | Freshly ground |
| Salt 🧂 | 1 ½ tsp | Kosher or sea salt |
| Chicken Broth 💧 | 6 cups | Low-sodium preferred |
| Tomato Paste 🍅 | 2 tbsp | For depth of flavor |
| Olive Oil 🫒 | 2 tbsp | For sautéing |
Start with the beans—dried is best (they’re cheaper and taste better). Bob’s Red Mill or the bulk bins at Whole Foods have great options. The ham makes all the difference here. Honey-glazed or smoked adds sweetness, but regular diced ham works too. Look for pre-diced ham at Costco or the deli counter—it saves time and keeps the texture consistent. The onion, garlic, and carrots form the flavor base, so don’t skimp on freshness. If you’re using frozen veggies, thaw them first—they’ll blend right into the soup without watering it down.
No dried beans? Canned beans work in a pinch, but drain and rinse them well to cut the sodium. Swapping ham for smoked sausage gives a different but equally delicious twist. Fresh thyme and oregano are ideal, but dried works at one-third the amount. The tomato paste might seem like overkill, but trust me—it deepens the flavor without making the soup taste canned. For the broth, low-sodium is key—you’ll be adding plenty of salt later. If you’re short on time, use vegetable broth instead, but the ham will still give it that rich, savory backbone.
This soup tastes even better the next day—plan ahead and make a double batch. Store in airtight containers in the fridge for up to 5 days or freeze for 3 months. The beans get even softer after reheating, so don’t rush it. I like to portion it into meal prep containers with a side of crusty bread—lunches sorted for the week. If you’re using a slow cooker, just dump everything in and let it simmer on low for 6-8 hours. No peeking—patience is the secret to that velvety texture.
Why You'll Love This Recipe
- Dried Beans, Done Right: I’ll be real—soaking those beans overnight sounds like a chore, but this recipe actually works with no-soak shortcuts. Just toss them in a pot with water, a pinch of salt, and let them simmer while you chop the ham and sauté the onions. No fancy techniques, no stress—just hearty, flavor-packed soup in one pot.
- Ham & Smoky Depth: That crispy ham hock or smoked ham bone? It’s the secret weapon here. The broth gets rich, savory, and just a little sweet from the slow release of collagen, while the beans soak up all the smoky goodness. Honestly, the first time I made this, I forgot to add the ham until the last 30 minutes—still turned out ridiculous.
- Potluck or Pantry Staple: Between us, this soup is the MVP of gatherings. Bring it to a holiday dinner, a sick-day visit, or just a regular Tuesday night when you’re too tired to think. It reheats like a dream, travels well, and even tastes better the next day (yes, even on a Tuesday). Plus, the leftovers? Freezer-friendly for months.
- Budget That Feeds: Five types of beans might sound fancy, but they’re all cheap and shelf-stable. A single ham bone stretches this into six servings, and the flavor only gets better as it sits. I’ve made this on grocery-store beans and store-brand broth—still nailed it. Perfect when you want to feed a crowd without breaking the bank.
Step-by-step instructions for 10 bean soup with ham
Here's how to make this hearty, protein-packed soup that's perfect for chilly days.
Soak and Prepare All the Beans
Start by rinsing all the dried beans thoroughly under cold water to remove any debris. Place each type of bean in separate bowls or the same large bowl if you're comfortable with mixing them. Cover them with plenty of cold water—at least 2 inches above the beans—and let them soak for 8-12 hours or overnight. This step is crucial because it dramatically reduces cooking time and ensures tender beans.
I usually do this before bed so the beans are ready to cook in the morning. If you're short on time, you can use the quick-soak method: Boil the beans for 2 minutes, then let them sit off heat covered with hot water for 1 hour. Just make sure they're fully covered with water throughout the process to prevent them from absorbing too much liquid and becoming mushy.
Sauté the Aromatics and Ham
While the beans soak, heat the 2 tablespoons olive oil in a large pot over medium heat. Add the 1 pound diced ham and cook for 3-4 minutes until it starts to brown slightly. Remove the ham with a slotted spoon and set it aside—you'll add it back later.
In the same pot, add the 1 whole yellow onion, 3 whole carrots, and 3 whole celery stalks, all chopped. Cook for 5-7 minutes until the vegetables begin to soften and the onion becomes translucent. Add the 4 cloves minced garlic and cook for another 30 seconds until fragrant. This step builds the flavor foundation for your soup, so don't rush it.
Combine Everything and Simmer
Drain the soaked beans and add them to the pot with the sautéed vegetables. Stir in the 2 tablespoons tomato paste, 2 whole bay leaves, 1 teaspoon dried thyme, 1 teaspoon dried oregano, 1 teaspoon ground black pepper, and 1.5 teaspoons salt. Pour in the 6 cups chicken broth and give everything a good stir to combine.
Bring the mixture to a boil over high heat, then immediately reduce the heat to low and cover the pot. Let it simmer gently for 1 hour. You'll know it's ready when the beans are tender and the flavors have melded together beautifully. If the soup gets too thick during cooking, add a little more broth or water to reach your desired consistency.
Finish and Adjust Seasoning
After simmering, remove the 2 bay leaves from the soup—they've done their job and can be a bit bitter if left in. Return the reserved ham to the pot and stir well to distribute it throughout the soup. Taste and adjust the seasoning if needed, adding more salt or pepper as necessary. The ham should infuse the soup with its savory flavor, making each spoonful hearty and satisfying.
Let the soup sit off the heat for 5-10 minutes before serving. This resting time allows the flavors to settle and the soup to thicken slightly, making each bowl even more delicious. Serve it hot with crusty bread to soak up every last drop of that rich, flavorful broth.
Pro Tips For Making 10 Bean Soup Recipe With Ham
- SOAK BEANS SEPARATELY: Navy and Great Northern beans need 8+ hours of soaking, while kidney and black beans can handle a quick 2-hour soak in hot water. I learned this the hard way—mixing them all together means some beans stay rock-hard while others turn mushy. Sort them into batches to save time and avoid texture nightmares.
- CRACK THE HAM BONE: Skip the pre-cooked ham hocks and use a fresh ham bone instead—it’s cheaper and adds depth. Smash it with a rolling pin or meat mallet to expose the marrow, then roast it at 400°F for 20 minutes before adding to the pot. That burst of flavor is the thing that matters most in a 10-bean soup.
- SIMMER, DON’T BOIL: Once the beans are tender, drop the heat to a bare simmer—no rolling boil. I used to ignore this, and the soup would turn gluey or split open. A gentle bubble keeps the beans intact and the broth clear. Trust me, your future self will notice the difference.
- SAVE THE SOAK WATER: After soaking, don’t pour out that starchy water—strain it and add it back to the pot. It’s liquid gold for flavor and helps thicken the soup naturally. I skip this when I’m lazy, but the dish is noticeably better when I don’t. (Yes, even if you’re impatient like me.)
Essential equipment for this recipe
Large Pot Essentials
You’ll need a large, heavy-bottomed pot—I love my All-Clad 6-quart Dutch oven—to handle all those beans and broth without boiling over. A 6-8 quart capacity is ideal for this recipe, giving you room to stir and prevent spills. If you’re using a slow cooker, a 6-quart model works perfectly for the hands-off approach. Avoid thin, lightweight pots—they heat unevenly and can scorch your onions or burn the tomato paste. 🔥
Bean Soaking Tools
For soaking your beans, a wide, shallow bowl or glass storage container is best—it lets you cover them with plenty of water while keeping them submerged. I use a quart-sized mason jar for each type of bean when I’m prepping ahead. If you’re short on space, a large mixing bowl works too, but
Knife and Cutting Board
A sharp chef’s knife and large cutting board are non-negotiable for chopping onions, carrots, and celery efficiently. I swear by my Victorinox 8-inch chef’s knife—it stays sharp and handles everything from dicing ham to mincing garlic. Pair it with a non-slip cutting board (like OXO Good Grips) to keep your ingredients secure while you work. Pre-cutting all your veggies before starting saves time and keeps your workspace organized. ✨
Measuring and Spice Tools
Precision matters with spices and broth, so grab a small measuring spoons set (I use OXO stainless steel) for your thyme, oregano, and pepper. A liquid measuring cup is handy for the broth and tomato paste, while a kitchen scale (like Escali Primo) ensures accurate measurements if you’re scaling the recipe up. Don’t forget a fine-mesh strainer for rinsing beans—it catches debris better than a colander. 💡
Slow Cooker Option
If you’re using a slow cooker, any 6-quart model will work—Crock-Pot or Hamilton Beach both do the job. The beauty of slow cooking is that you can dump everything in and let it do the work for 6-8 hours on low. Just
Storage Containers
For leftovers, airtight glass containers are your best friend—they keep the soup fresh for 5 days in the fridge or 3 months in the freezer. I love Pyrex 4-cup portions for meal prep, or mason jars for easy reheating. Label them with the date to track freshness. If freezing, leave 1 inch of headspace to prevent ice crystals from breaking the container. 🥫
Nutrition facts
Frequently asked questions
Can I substitute canned beans for dried in this recipe?
Yes, but you’ll need to adjust the liquid and cooking time. Use 3 (15 oz) cans of each bean type (drained and rinsed) instead of dried, and add 1 extra cup of broth to compensate for the lost moisture. The soup will be ready in about 45 minutes instead of hours—just simmer until everything is heated through and the flavors meld. For best texture, rinse canned beans thoroughly to reduce sodium.
How can I make this soup in a slow cooker?
Simply combine all ingredients (including soaked beans) in your 6-quart slow cooker and cook on low for 6-8 hours or high for 3-4 hours. No need to pre-cook the ham or veggies—just dump everything in and let it work its magic. The slow cooker’s gentle heat ensures tender beans and deeply flavorful broth without watching the pot. Add extra broth if the soup seems too thick at the end.
Why do my beans turn out mushy or unevenly cooked?
Mushy beans usually mean they absorbed too much liquid or didn’t soak long enough. Always soak dried beans for 8-12 hours (or use the quick-soak method), and use a heavy-bottomed pot to prevent scorching. Different beans cook at different rates—check for doneness by tasting a few beans after 1 hour of simmering. If some are still firm, let it cook another 30 minutes. Avoid overcrowding the pot, which can trap steam and make beans waterlogged.
Can I make this soup vegetarian?
Swap the ham for smoked tofu, vegetarian sausage, or extra mushrooms (8 oz cremini) for umami depth. Use vegetable broth instead of chicken broth, and add 1 teaspoon liquid smoke or a pinch of smoked paprika to mimic the ham’s smoky flavor. The beans and spices will still deliver that hearty, satisfying texture—just skip the meat entirely if you prefer.
How do I reheat leftovers without making the soup watery?
Reheat gently on the stove over low heat with the lid slightly ajar to let excess moisture escape. For best results, stir in 1-2 tablespoons of broth or water per cup of soup to restore thickness. Microwaving works too—heat in 1-minute intervals, stirring between each, until warmed through. Never reheat to a boil, or the beans may turn mushy. The soup actually tastes better the next day as flavors meld further!